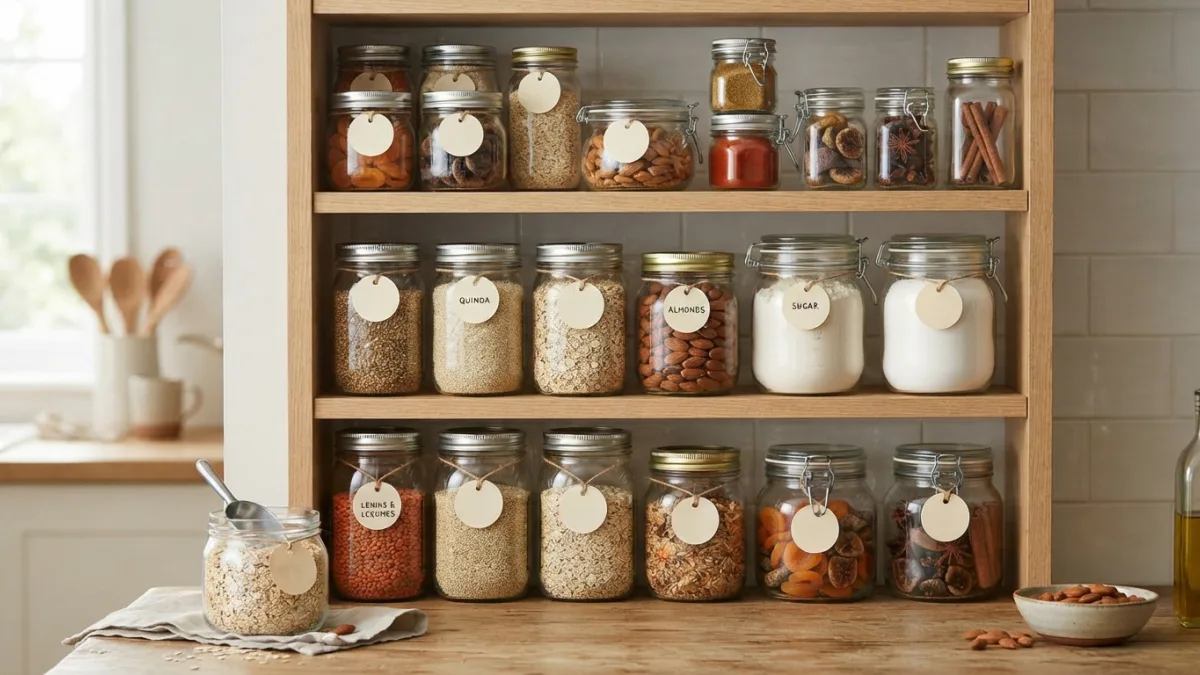
Reusable Jar System: 7 Easy Steps for Bulk Food Storage
Walk into almost any organized kitchen on social media and you’ll see the same thing: rows of matching glass containers holding oats, lentils, chili flakes, and pretzels. It looks beautiful, sure — but a reusable jar system is much more than a photo opportunity. Done right, it cuts your packaging waste, keeps food fresher for longer, and saves real money because you finally know what you already own. The trick is building the system on purpose instead of buying jars first and figuring it out later. This guide walks you through seven practical steps, from auditing your shelves to choosing lids that actually seal, so your pantry works for the way you really cook.
Why a Reusable Jar System Beats Bags and Boxes
Cardboard boxes crush, plastic bags tear, and half-open packets invite pantry moths. Glass and steel containers solve all three problems at once. A well-planned reusable jar system also makes bulk food storage genuinely practical — you can refill at a bulk bin or buy a large sack of rice and split it into portions you’ll actually use. There’s a money angle too, because buying in bulk usually costs less per pound than single-serve packaging. And visually, transparent jars turn your shelves into an inventory list. When you can see that you own four bags of quinoa and no baking soda, your shopping list writes itself. That visibility is the quiet reason this approach sticks while other organizing trends fade. If you want to dig deeper, our guide on Beginner’s Guide to Cooking from Pantry Staples to Avoid Last-Minute Takeout covers this in more detail.
7 Easy Steps for Bulk Food Storage
Step 1: Audit What You Actually Store
Before you buy a single container, empty your shelves onto the kitchen table. Group everything into categories: grains and pasta, beans and legumes, baking supplies, spices, snacks, tea and coffee. Toss anything stale or long expired, and note roughly how much space each category needs. Most people discover they keep about 30 to 50 regular items — far fewer than they imagined. Write down the volumes too: a bag of flour needs a big jar, while turmeric needs something small. This audit is the foundation of a reusable jar system that fits your life rather than a stranger’s. Skip it, and you’ll end up with twelve identical containers and nothing that holds five pounds of rice.
Step 2: Choose Jar Materials and Sizes That Match the Food
Not every food wants the same home. Dry goods you buy in large quantities need wide, tall jars. Spices need small containers you can reach into with a measuring spoon. Snacks need something the whole family can open without a fight. Glass is the most popular choice because it doesn’t stain, absorb odors, or react with acidic foods, and it goes straight into the dishwasher. Stainless steel works well for pantry items that sit in sunlight, since light degrades flavor and color over time. Food-grade plastic still has a place for heavy items you lift daily — a five-pound flour jar in glass gets heavy fast.
| Material | Best for | Strengths | Watch out for |
|---|---|---|---|
| Glass (Mason or square) | Grains, beans, spices, snacks | Non-reactive, dishwasher safe, easy to see contents | Heavy, breakable, lets in light |
| Stainless steel | Coffee, tea, ground spices | Blocks light, very durable, lightweight | You can’t see what’s inside |
| Food-grade plastic | Flour, sugar, bulk refills | Light, cheap, hard to break | Can stain or hold odors over time |
| Ceramic | Salt, tea, countertop display | Blocks light, attractive on the counter | Opaque, often not fully airtight |
Step 3: Get the Lids Right
Lids make or break the whole project. Airtight jar lids with a silicone or rubber gasket keep out humidity, insects, and the stale-air flavor that ruins nuts and whole-grain flours. Clamp-style bail lids and screw-on lids with a rubber ring both work well; standard two-piece canning lids are fine for storage but wear out with repeated use. Whatever you pick, standardize. If every container in your reusable jar system takes the same lid size, replacing a lost or damaged one takes seconds instead of a shopping trip. For foods you open daily, choose a lid you can work one-handed. A perfect seal you never want to fight with is a seal you’ll stop using. This connects closely with another common issue — see Zero-Waste Baking: What to Do with Extra Dough, Egg Whites, and Kitchen “Scraps” for more on that.
Step 4: Build a Labeling System You’ll Keep Up With
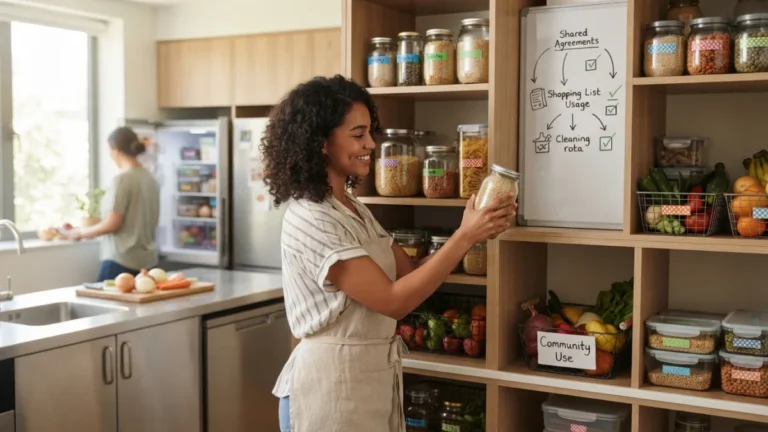
Labels are where good intentions usually collapse. Keep it simple and repeatable. The best pantry labeling ideas include three pieces of information: the name of the food, the date you filled the jar, and — for anything you cook from a recipe — basic instructions like a water-to-grain ratio. Write the date on a small piece of masking tape on the lid so you can update it without peeling anything off the glass. Chalk markers, printed vinyl labels, and simple paper tags all work; the best one is the one you’ll actually redo on refill day. Uniform labels also make the shelf easier to scan, which is half the point of the system.
Step 5: Create a Refill Kit for Bulk Shopping
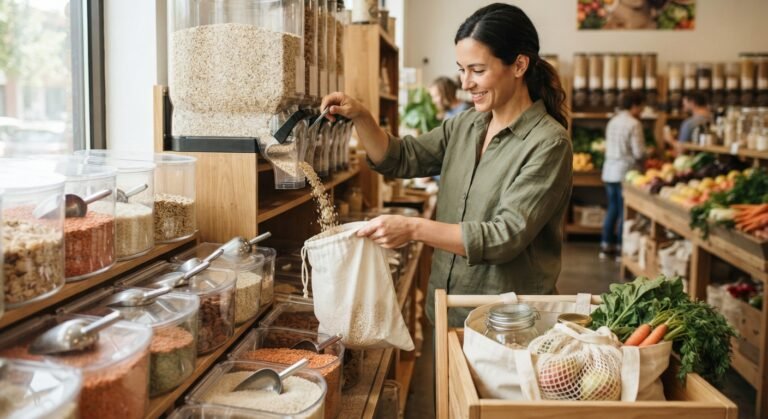
Hauling heavy glass to the store is not required. Build a small refill kit instead: sturdy cloth bags, a few lightweight containers, and a permanent marker. Many stores let you weigh empty containers first and subtract that tare weight at checkout, so ask at customer service before you fill anything. Then decant at home into your permanent jars. This step is what turns a pretty shelf into a working zero waste pantry, because it closes the loop between shopping and storage. Keep the kit by the door or in the car so you never leave it behind. A reusable jar system only reduces waste if the refilling habit survives a busy week.
Step 6: Zone Your Shelves by How You Cook
Arrange containers by frequency of use, not by size or color. Everyday items — coffee, oats, olive oil, the five spices you reach for constantly — belong at eye level and near the front. Backstock and holiday baking supplies go high or deep. Give snacks their own low shelf if you have kids, so they can serve themselves without climbing. Glass spice jars work best in a shallow drawer or on a tiered rack where you can read every label at a glance, because a spice you can’t find is a spice you’ll buy twice. Group by meal type if that matches your habits: breakfast zone, baking zone, snack zone. Logic beats symmetry every time. You might also find our article on One-Pot Low-Waste Meals: Simple Recipes That Use Up Leftovers helpful here.
Step 7: Maintain and Rotate Your Reusable Jar System
Maintenance is short but non-negotiable. When a jar runs low, empty the last of it into a small bowl, wash and dry the container completely, then refill and put the old contents on top — classic first-in, first-out rotation. Moisture is the main enemy, so never pour dry goods into a jar that’s even slightly damp. Check gaskets a few times a year and replace any that have hardened or cracked. Most spices keep their best flavor for roughly one to three years depending on whether they’re whole or ground, and the USDA’s food safety resources are a reliable place to check storage guidance for pantry staples. Ten minutes every season keeps the whole setup running.
Mistakes That Quietly Ruin a Good Setup
The most common error is buying containers before measuring the shelf. Tall jars on a short shelf force you to store things sideways, and the system falls apart within a month. Another mistake: storing everything in clear glass on a sunny counter, which fades spices and turns nuts rancid faster. Move light-sensitive items into a cupboard or use opaque containers. Overfilling is a third trap — leave a little headspace so you can scoop without spilling. Also resist the urge to decant foods that genuinely need their packaging, like anything with cooking instructions you rely on, unless you copy those instructions onto the label. And don’t decant fresh items that need refrigeration into a pantry container; that’s a food safety problem, not an organizing one.
You Don’t Need to Buy Everything at Once
The version of this project you see online — 60 matching containers, installed in a weekend — is expensive and rarely necessary. Start with the ten foods you use most. Save and wash pasta sauce jars, pickle jars, and coffee containers; many standard jars share lid threads, and the humble Mason jar has been a household standard for well over a century precisely because it’s cheap and endlessly reusable. Thrift stores, restaurant supply shops, and local buy-nothing groups are goldmines. Add containers gradually as you find foods that deserve them. A mismatched reusable jar system that costs almost nothing still works better than a matching one you never finish assembling. For a related walkthrough, check out How to Read Food Labels for Sustainable, Ethical Choices.
Making It Last Beyond the First Month
The difference between a system that survives and one that quietly reverts to torn bags comes down to friction. If refilling takes too long, you’ll stop. So keep a funnel and a measuring cup in the pantry, store backstock right next to the jars they refill, and keep spare labels in the same drawer as the marker. Review the whole setup twice a year, ideally at the start of spring and before the winter holidays, and be honest about what you no longer eat. For more guidance on safely storing home-preserved and dry foods, the National Center for Home Food Preservation is a solid, research-based reference. Build the habit, and the shelf takes care of itself.
Frequently Asked Questions
How much does it cost to start a reusable jar system?
Far less than most people expect. If you reuse jars from food you’ve already bought, your only real cost is a pack of replacement lids and some labels — often under $30. Buying new matching containers for a full pantry can run into the hundreds, so build gradually and prioritize the foods you use weekly.
Are glass spice jars better than plastic ones?
Glass generally wins for spices because it doesn’t absorb strong aromas or stain from turmeric and paprika, and it washes clean in the dishwasher. The bigger factor is light and heat. Keep spices away from the stove and out of direct sun, or choose opaque containers, and they’ll hold flavor much longer regardless of material.
Can I store flour and grains long term in regular jars?
Yes, for everyday quantities, as long as the jar is fully dry and sealed with an airtight lid. Whole grains and whole-grain flours contain oils that go rancid faster, so buy smaller amounts or keep extras in the freezer. For multi-year storage, specialized oxygen-barrier methods work better than standard pantry containers.
How do I stop pantry moths from getting into my jars?
Moths usually arrive inside packaging, not through the air. Inspect bulk purchases, and freeze grains, flours, and nuts for several days before decanting if you’ve had problems before. Good gaskets keep insects out of sealed containers, so any infestation stays contained to one jar rather than spreading across the shelf.
What’s the best way to label jars without permanent marks?
Removable vinyl labels, chalkboard stickers, and masking tape all come off cleanly. Put the food name on the jar and the fill date on the lid, so you only rewrite one small piece of information at each refill. Keep the format identical across every container — consistency makes the shelf readable at a glance.